Civil 3D從2007版開始,就具備Google Earth資料的應用能力。除了可以下載地形與影像進行加值外,還可以將設計成果發佈至Google Earth中。
Civil 3D 2010插入Google Earth影像與地形方法
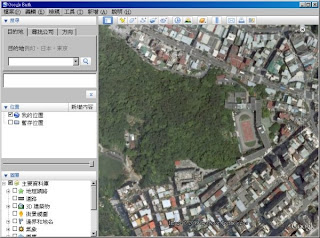
1. 首先使用者要先開啟Google Earth軟體。本文使用Google Earth 5.0版。
2. 選定需要使用的位置後,請按下"R",讓Google Earth的影像與地形可以轉正。
注意:一定要將Google Earth的影像與地形轉正,否則會無法匯入。
3. 開啟Civil 3D 2010軟體。然後由切換到Insert TAB,選擇Import->Google Earth Image and Surface。
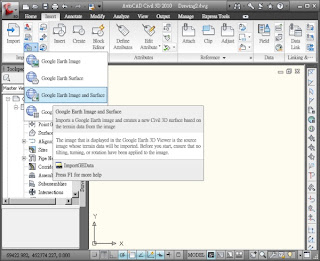
4. 當按下Google Earth Image and Surface後,Civil 3D 2010就會去攫取Google Earth的影像與地形。如果使用者有設定圖面的座標系統,可以直接按下Coordinate System。影像地形就會自動載入。
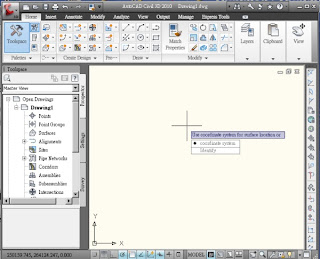
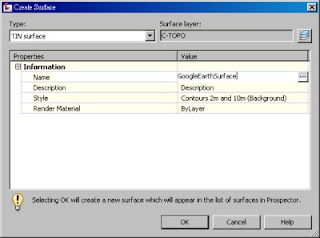
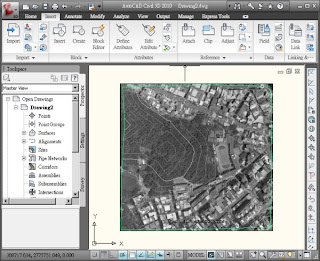
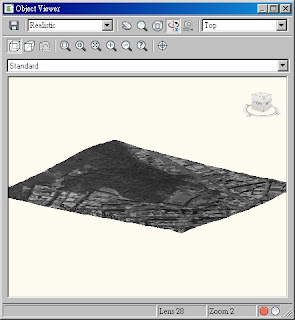
5. 最後使用者可以用物件瀏覽器Object Viewer來檢視Google Earth的影像與地形,而Civil 3D也會自動套疊。
Civil 3D 2009插入Google Earth影像與地形方法
基本上2009版與2010版匯入的方法相同。只有在操作上些許不同。
使用者在2009版匯入時,選擇檔案->匯入->匯入Google Earth影像與地形。
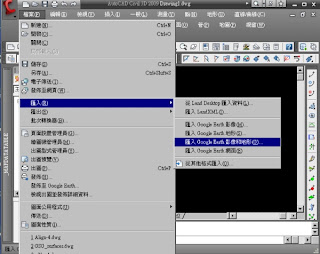
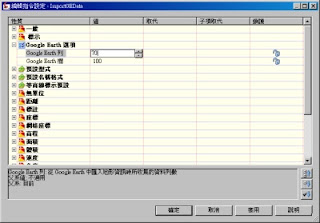
但是如果使用者使用的是Civil 3D 2009版,搭配Google Earth 5.0版。那在下載Google Earth資料前,請先在設定頁簽中,更改ImportGEData與ImportGESurface的參數。
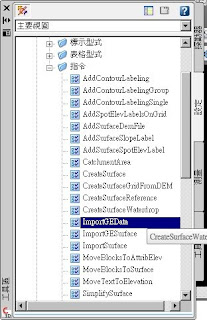
將ImportGEData與ImportGESurface中的Google Earth選項,Google Earth列與欄都改成70。
Google Earth與Civil 3D的結合,是一種新的應用。過去很多GIS界的專家,一直在思考如何能夠把Google Earth不只當作3D展示平台,而可以進接的加值,也許在工程上的應用就是一個很好的例子。
以前,在工程設計開始前,工程師都要收集很多現地資料,這些資料如影像、地形現況、地形等,費用都很高。現在,可以利用免費的Google Earth資源,降低初期的成本。
再者,在大範圍的資料瀏覽過後,對於工程本身的蓋逛與周邊的環境影響評估,就更具有通盤性的瞭解。這可以說是工程化GIS發展的第一步。
後續還會介紹如何將設計成果發表至Google Earth,屆時我們再來討論,發佈後加值應用的效益與價值。


沒有留言:
張貼留言